- News
- Air conditioned holiday house at Kalbarri for rent to the public and club members at competitive rates. Read more
- Updates to this website are all listed in What's New or use Search
A light weight folding fishing rod stand like this can be made by a handy person in a few hours from a few lengths of aluminium extrusions, with simple tools like a drill, hacksaw, hammer, file and a vice.
The stand has six main components. This design has wing nuts to allow the stand to be disassembled for transport.
One extruded aluminium tube or right angle, about 2100mm (7ft) long, forming the back leg of the tripod. The one in these photos is 25mm (1 inch) diameter, 1.6mm (1/16 inch) wall thickness.
Two extruded aluminium tubes or angles, 2100mm (7ft) long, forming the two front legs of the tripod. The ones in these photos are 19mm (3/4 inch) diameter, 1.6mm (1/16 inch) wall thickness.
If you use angles, it may be easier to bend the brackets into shape to match the shape of the legs. If you use angles, make sure they are strong enough, like 25mm (1 inch) or 32mm (1.25 inch) with at least 3.2mm (1/8 inch) thickness, or more. For any given size, tubes are much stronger than angles, but you can use whatever is available if it is strong enough. Remember you will hang a heavy bucket off it and when you get a fish, there will be quite a force on the legs.
The top bar is for the upper part of the rods to rest against. This is in two pieces, held on with bolts fitted with wing nuts, so that it can be removed easily for packing and transport if needed. This has two lengths of 25mm (1 inch) by 3mm (1/8 inch) flat extrusion each shaped as a flat section with a rough half circle in the centre to fit around the back leg, and with the longer one shaped with a half circle at the ends so that the rod will rest there.
Top bar
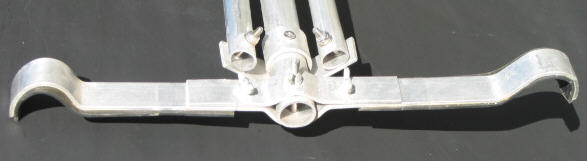
This photo shows the shaping of the outer ends of the top bar. The bar is about 450mm (18 inches) long. The bar is padded on one side with flat rubber strip to protect the rods.
Shaping of top bar
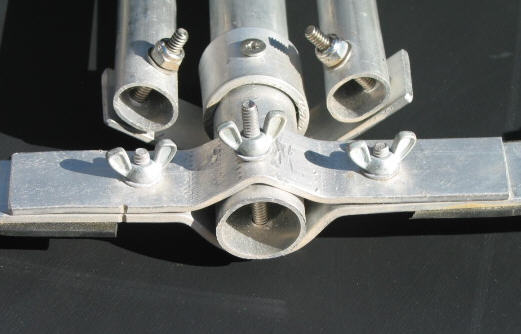
This photo shows the shaping of these two pieces of the top bar and how they fit around the back leg.
The two small matching grooves in the left hand side of these pieces are so that you know which way they should be reassembled so that the holes will all line up.
Shaping of pivot bar
The pivot bar to allow these three legs to fold out to form the tripod. This is the most difficult part to bend.
It needs to hold on to the back leg tightly, hence is bent into almost a full circle and has a bolt which goes through it and the back leg
Then the two flat ends are bent back so that they are almost at right angles to each other so that the front legs of the tripod will pivot in the correct plane when they are connected. The next photo shows this in more detail.
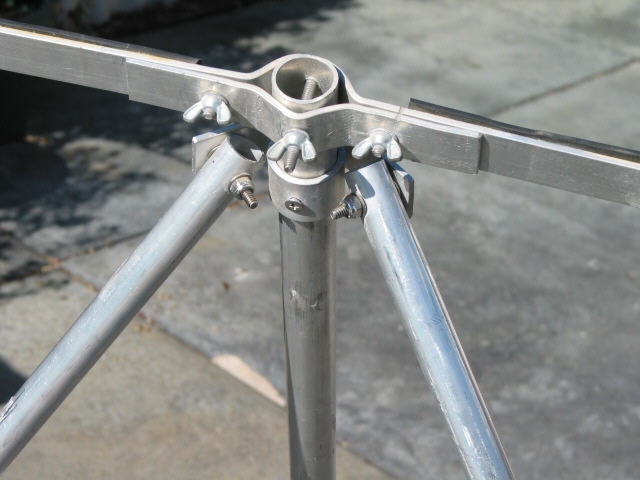
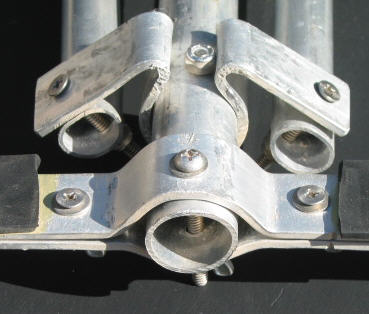
How the legs connect together and pivot
This photo shows how the front legs connect to the bracket and pivot to form the tripod, the placement of washers, bolts, etc.
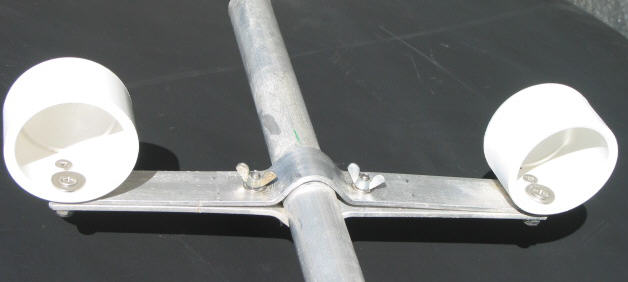
Bottom bar with two "cups" for the butts of the rods
The bottom bar has two "cups" for the butts of the rods to sit in. This bar is about 250mm (10 inches) long, that is shorter than the top bar so the two rods point slightly apart and away from each other at the tips.
This bar takes all the weight of the rods and so needs to be reasonably strong, and needs to grip the back leg very tightly.
Mine is made of two pieces of 25mm (1 inch) by 3mm (1/8 inch) flat extrusion each shaped as a flat section with a rough half circle in the centre to fit around the back leg, with a bolt and wing nut on each side to allow the height of the bar on the back leg to be adjusted by sliding it up or down the back leg, and for dismantling for storage and transport if required.
The two "cups" are 40mm (1.5 inch) end caps for PVC water reticulation pipes. They are fitted at a slight outward facing angle.
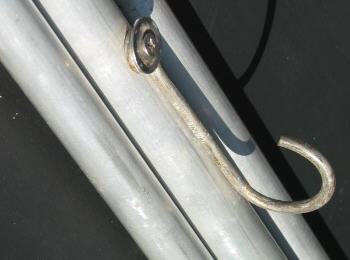
Hook for hanging a weight or bucket to stabilise the stand
A weight is needed to give the light weight stand some stability. This is just a large fish hook, with the point and barb cut off, and bolted to the back leg on the inside of the tripod as shown in the original photo in Hints and tips page.
Ideally the bucket or weight should be low down on the back leg, but this may get in the way of the reel or line. Work out what sized bucket or weight you will use, then place the hook so that the bucket doesn't get in the way.
Bolts, nuts and washers are stainless steel, 3/16 inch, but could be 6mm (1/4 inch). I've used countersunk screws because I had them in my tool box, but round head would probably be better. Hexagonal nuts are the self locking type with a nylon insert, and are tight where movement isn't wanted and loose where they form the pivot between the two front legs and the bracket. The wing nuts allow some things to be loosened and tightened without a spanner.
You might find it hard to get stainless wing nuts. The alloy ones will need to be kept well greased, or they will corrode and jam, and the wings break off easily if you force them.
Extras not shown are some ropes fitted with quick release clips to fix to the rods and to the stand for whenever you are not standing right next to it.
Remember, if you get a good fish on, and there is a tangle or something snags and you're not close enough to grab the rod, the fish has a lot of leverage and you could lose the rod and reel. Believe me, it has happened!
Photos above and text, Terry Fuller
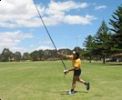
And finally, put it to use!
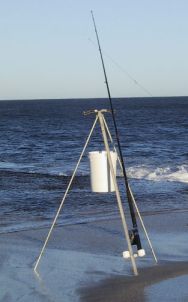
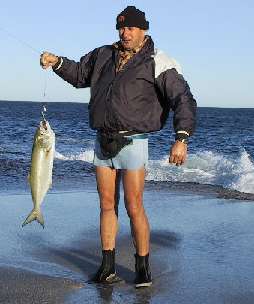
A similar rod stand in use. A fine tailor caught by Fred Neal
Come to some Club events as a visitor, to our monthly dry casting mornings, fishing trips or general meetings. Read more
Come to a Club event to meet us, then fill out and send us an application for membership plus the nomination fee. The form needs to be signed by you and two financial Club members. Read more